Saturday, December 26, 2009

studio time

It is cold outside, and warm and bright in my studio. I made some presents this month: scarves amongst them: stitched scraps in various whites with black velvet on the backs.
And a crocheted ruffle scarf. (Easy: working the long way, stitch up and down the length a few times and then do a couple more rows increasing at the rate of 2 new stitches for every 1 stitch in the row below, or 3:2. Automatic Ruffle.)I also made a Christmas journal in November to use in December with Dawn Sokol and loved it. This process of using any old papers, of all different sizes, painting some, collaging others, doodling, writing sideways - and finally I am beginning to loosen up. The payoff to that un-lock is that I really journaled this past month. Not just daily planner stuff in longhand (which has its place - that Edwardian Lady Gardener), not just ranting and raving (which is important I think, especially in the privacy of one's own journal), but actually trying on thoughts and then the paint and collage work, maybe, allowing enough breathing time to listen to the answers from the Universe.
Here is the end product:
-ribbons sticking out from the tags I put into the collaged pockets - I even did an embroidery on felt (it was a prayer one day when I was desperate) and because it had come out of the writing I wanted to add it into the journal so I stitched it into the seam of the next page. It came out lovely, and thick, and rich.

So I decided to make a new journal, sort-of like the last, to take me into 2010. Here is the cover. Hmm ... that looks a little bland. Dawn encouraged us to draw on our covers... Later.
The construction was crazy - different from my Christmas journal: I machine sewed 5 signatures about 1cm apart onto a double layer of cotton cloth. Then I zig-zag stitched the cardboard covers to the fabric, here. Slowly, gently, my machine agreed to all of it. I painted some canvas for the outer cover. See the pocket of brown paper bag that I glued under the canvas? That will be for medallions or components that I have yet to collage into place.
And then for pages I used papers that I have in an I-don't-know-what-to-do-with-you box. Some are experiments like this orange monoprint I drew on freezer paper and then printed onto drawing paper. Some are old tourist maps from various places in Maine. (Next to a not very successful, uh, I don't know what orange page.)

A short fold of a calendar photo page on the left, between my fingers, and a Traci Bautista idea from her book, Collage Unleashed, on the right. (Dyed paper towel brayered, with wrinkles, onto drawing paper.)

A page of old photos I got at a yard sale 20 years ago that I sewed in upside down!! Which is getting ready for some gesso - I will just paint over that.
And an acrylic painted page, complete with sprays of red, watered acrylic.
So, I am off and running. I have lots more pages to gesso and paint. Then collage, draw and write on. God is in Her heaven, and the voice of the artist is heard in her journal. This is fun.

Monday, December 14, 2009

Free printables

Lisa Volrath has done it again: given us some Christmas images to play with. Go here, to her site, to check them out.

Happy crafting.

Friday, December 4, 2009

Tuesday, December 1, 2009

December Journal II

Oh! Here we go: The front cover of my December Art Journal: For me there has always been a big wind-up to the actual day. So I thought that I might just come out and name the journal after what is going on for me this month. Although, I am not much of a Christian anymore. I was raised that way, but as I grow older I find the Wiccan Winter Solstice traditions to have more meaning. I could have named my journal that ... but I think that I have some exploring to do here. So I am O.K. with the cover as it stands.

Here is the back cover. I am liking the bird.
And now for some of the interior pages. The page on the right is a brown paper bag that I stamped, drew, collaged, and sewed for some ATC backgrounds. I love it and this was about all that there was left.And a close-up of that green page - see that wrinkly part at the top? Well, when the paint below was pretty dry but the red paint on top was still a bit wet, I scrunched up a tissue and blotted the paint a few times. I love the texture.
And! And, do you know what? I often find acrylic painted pages to be kind of rough and bumpy - not excellent for journaling - but when I was painting the page above, and these two below, I streaked the paint down and around with tissues: it made them wonderously smooth!

You probably knew that. Well, as I said, there is always something more to learn.
How about this page? I made it with Traci Bautista's Collage Unleashed technique of dying paper towels and then transferring the dye to white paper.

A page made from an old map:

The center pages are all of a paper doily that I could get to fit. They are so fragile. I may have to come up with a scheme to make them stronger. I am waiting to see what I write/art on them first.

Three yummy photos of two pages that I painted and then stuck against each other - when I pulled them apart (immediately) they made all of these little "prarie grasses" marks.

Look:

And here: (tilt your head to the left to get the prarie grass feel)

This page on the right I painted, rubbed smooth, and then dragged glitter paint across.

So how much fun do you think I will have journaling this month?!

Yay!

December Journal

Eeeeee! I am taking an art journaling class with Dawn Sokol, of 1000 Artist Journal Pages fame. She is walking us through the making of a special journal that she calls 12.31, as in it will be done on the last day of December. This has been fun. A new way to see December and this holiday that is so huge in this culture.

Even though I am familiar with some of the techniques, I am still stretching and learning. So I am here today showing you some of my progress so far ... er, here I am trying to show you ...

Y'know, I have heard of Blogger having trouble loading pictures...

Phooey.

I am going out and in again, that worked last time.

Friday, November 20, 2009

Three Copyright Free Paintings

These are the three paintings that I mentioned in the previous post. They are acrylic paintings for a new artist journal that I am working on. They are just the base pages, ready for collage, drawing and writing.
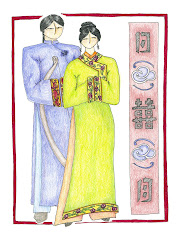
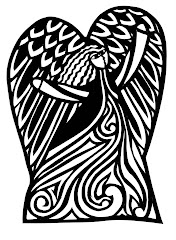
I offer them to you, completely copyright free, in gratitude for what abundance af art and beauty I live in, indeed for all the Gifts I have been given.Print them out for your own journals, Artist Trading Cards, greeting cards, origami, or whatever else you would like. Again, I - we - would love to see what you have done, so post a comment here with a link to your blog, flickr, site, wherever. You are free to pass this post/these pics to anyone you like.

Have fun!

I am here...

I feel like I am Rocky, in that moment where he is running up the steps and stretches out his arms into the morning sun. Well not quite that triumphant but bloody well determined anyway.

You probably thought that I fainted and fell off a cliff.

Not anytime soon.

Life happens. I go non-verbal while I process it all. I have been longing to get back to writing, so I am dragging myself over here to begin. I am seeing that when I hesitate, stumble around wordlessly, a bit scared (or even nigh on to petrified) maybe, perhaps, I am closer to saying the true thing, being the strong one. That Marianne Williamson quote about fearing our fabulousness. I swear to God that pisses me off: that any of us should ever doubt - that we are taught to doubt - what is excellent in us because it is outside the norm. Although I get the whole go-along-with-the-community-to-dwell-within-the-safety-of-the-community thing, I also am experienced enough to know that it is our unique gifts that will save the world.

Also I am a parent and see how very easy it is to get caught up in the yearning for status quo and bark at my family to strive for that too. Thus squashing the tender blossoming I am soooo honored to bear witness to.

I was graced yesterday to allow my deep need to fit into whatever personal version of "community synch" I imagined to be true just slide on past, and simply support my child and his demanding, but brilliant, pace of learning. I came home thrilled, or maybe just amazed that I had listened to that same God I just swore by. And I came home with a happy, engaged child. No squished blossoms on anyone's part.

Parenting is the most amazing Gift. Like the Goddess Inanna stripping off her every outer adornment and protection, we are offered an opportunity to leave every last vestage of "normal" and bear witness to Ereshkigal: moan and rock like the flies with the Queen of our Souls:

The kurgarra and galatur [the flies] moan with Ereshkigal, appeasing her anguish by the echo of their concern, affirming her in her suffering. Enki has understood that complaining is one voice of the dark goddess, a way of expressing life -- valid and deep in the feminine soul. Such complaining does not seek alleviation as much as it is to simply state the existence of things as they are felt to a sensitive and vulnerable being. There is no need for a stoic-heroic superego perspective of judging it as foolish and passive whining, but rather it should be viewed as autonomous fact -- “that's the way it is.” Suffering is seen as part of reverencing.

Ereshkigal is so touched by the attention they offer her in her pain that she extends herself and offers gifts of fertility and growth.


We are offered the chance to allow another's reality to be True and Good (straight from God) no matter how late it will make us at the grocery store or how awkward we think it might make us look in front of our friends, and that very stretching to listen (with God) to our unutterably marvelous children is, although absolutely a treasure for our children, also, fantastically, a gift to ourselves as well.

Like Ereshkigal, our children (and our own inner children) (and God) hear our attentive moaning with and extend themselves, offering us Blessings.

I grew up hearing all about how I was supposed to be seen but not heard. (Raise your hands: how many of you heard that too??) And so I thought that that was my job as a parent: to "spend the first two years of their lives teaching my children to walk and talk and the next sixteen years to sit down and shut up". But I now can see that this method just teaches us that we must be pretty enough to be visually pleasing and yet that we have nothing inside of any value to anyone, least of all ourselves. I can see, miraculously, in my children that this is blatently not true.

At every turn my children open doors for me. Through loving them (listening to them, even when their hungers or needs don't fit my schedule or sense of decorum, and even when I am quite sure that I have no strength or talent for doing what they need to have done) I have experienced my own wonderfullness. This happens when I am making way for what they can do, as well as making allowances for what they cannot do.

And then sometimes, often, yesterday, if I stay right with them, mirroring to them what I see, confirming to them by altering my pace to suit theirs that they are infinately loveable, then what they used to not be able to do they can now accomplish.

Oh. My. God.

And so my life has been full lately of this work. Or maybe just reverence.

Anyway, also, I have been painting. I am going to put three of my latest base journal pages here. In gratitude for all of the Gifts and Blessings afore mentioned in this post, and to keep them flowing, I offer them to you, copyright free, to print out and draw on, or cut up and collage with, or whatever strikes your fancy. Of course you are free to tell your friends and blog readers where you got them, and of course I would love to see your blog or Flickr links to what you did, but really, they are free for you to use however you would like.

Eeeps! I am having trouble loading photos... I will post this and try to load the photos in a separate post...

Goddess Bless all of us parents.
Goddess Bless the artists.
Goddess Blessings on and on the children.

Wednesday, October 14, 2009

Kreativ Blogger Award

Good morning. You will see in my sidebar that I was given the Kreativ Blogger Award by GypsyLulu. Thanks, G. So: I need to tell you 7 things about me and then pass this award on.

Hmmm ... Let's pass this on to:

1. http://jafabrit.blogspot.com/
2. http://alewivesgirl.blogspot.com/
3. http://beadlust.blogspot.com/
4. http://comfortdolls.blogspot.com/
5. http://alteredbelly.blogspot.com/
6. http://paperforest.blogspot.com/
7. http://claudinejalajas.blogspot.com/

And now some public secrets ...
1. I always wanted to be an artist and thought that this title was about the most wonderful and completely out of reach in the world. For me, anyway.
2. I have been sewing and cutting/pasting paper since I was old enough to hold the scissors (about 4 years old).
3. Thought #2. and all those years of practice and training had very little impact on Thought #1 for many decades.
4. I still feel a little odd about letting it be O.K. that I am who I most want to be.
5. I tried to stop. I thought that my work had to be elsewhere, but figured out that I couldn't. I now have two careers, and am making inroads to a third. Third Job. Third concurrent job.
6. What am I: nuts?
7. Whatever. I am a Mom: single parent of two homeschooled children. I am an artist-writer working on my fourth book. And the third is some kind of advocacy professional. Haven't worked out the deets yet. Good thing I'm a woman.

Tuesday, October 13, 2009

Monday, October 12, 2009

I Was Interviewed by Laura Bray

I have just finished an online class from Laura Bray called Multiple Streams of Income. Well, that is to say that the class is over, but I am not finished: I am going to be pouring over my class materials and learning from it for a very long time I think.

Laura is a great teacher, filled the 4 weeks with lots of information and really got me seeing all kinds of new options for my work. We were given lots of ways to view our livlihoods, and really asked to exercise and brainstorm our way through the possibilities with the company of others - worlwide. Very good.

Laura asked me for an interview at the end of class: read it here on her blog.

I would recommend her classes to any of you out there, not just artists.

Sunday, October 4, 2009

Art Charms From Number 6 Plastic

Remember a couple of days ago when I showed you some images of how I made charms for my art quilts? (The birds and heart triangles.) Well I discovered a slightly healthier source of #6 plastic - shrink plastic. Newman's Organic Ginger-O's.

So here is a fun project.

#1. Eat the cookies. By the way, I am pretty sure that all of the different flavors of Newman-O's come in #6 trays. Share them with friends. Read fairy tales to your children in between nibbles. Settle in with a cup of tea, your dreams and a couple of cookies.

#2. When the cookies are all gone (or if you put your cookies in a jar) rinse out the tray. Dry it off or not: see below, #4.

#3. Take a regular hole punch and punch a few holes. Because I will be sewing this onto an art quilt, I punched once at each top corner and five times along the bottom so that I can both attach it to the quilt and also hang beaded dangles from the bottom edge. You will not be able to punch the charm after it is heated. It becomes very thick and strong. (Like the magic shine on my hole punch?)
NOTE: If you are using the kind of shrink plastic that is sold in craft stores you are likely to get a thicker sheet which will shrink, but not shrink as much as these trays. The Newman People make these trays as thin as they can to keep waste down to a minimum. Thank you Newman People. These thin trays shrink to almost 1/3 of their original size. I started with a 6" x 8" x 2" tray (15cm x 20.5cm x 5cm) and ended up with a charm measuring 2.5" x 3" (6cm x 7.5cm). So use a regular 1/4" (5mm) hole punch - nothing smaller as the resulting hole will be too small for a needle. Look below to see where I threaded the green floss to help you see where I put my holes.

#4. With either a heat gun or a designated art oven at 275 degrees F (I have an old toaster oven that we never use for food), and in a well ventilated area, heat the tray on a metal baking sheet. I use aluminum foil over the oven tray or an old aluminum baking tray with the heat gun. It took me about a minute with my heat gun. In the oven you have to watch it. In both cases the plastic wrinkles and curls - it may even flip over. It will then uncurl and nearly flatten. I use cloth or tongs to pick it up out of the aluminum tray (mine has ridges) and set it on something flat, and while it is still hot press the piece completely flat with something flat (I had a jar lid, or use a book, a block...) Oh! And do you see below where there are little spots and bubbles on my charm? I did not dry my tray off first and I think that the water spots made the plastic take the heat unevenly. I have decided that this was an intentional design consideration...
You can still see the happy cookie ridges.

#5. Decorate with permanent markers. Consider the possibilities of drawing one design on one side and another part of the picture or design on the other side: the trunk of a tree on the back and the leaves in the front? The frame on the back, with accents and a quote on the front? Something like that.

I hope that you have fun, and please do leave me a comment linking back to your blog with photos of your Newman-O's charm!

Saturday, October 3, 2009

Online Open Studios Event

Greetings from my studio. Quilting Arts is publishing a fall issue of Studios magazine and invited its members to open our studios for an online tour. I am actually combining this with a view of some more of my Reconfigured Trash Art. You can go here to see who else is on the tour. This should be so, so good. I am going on tour as soon as I have posted. Meanwhile, Welcome! I am so glad that you stopped by!

Here is a view of one of the walls that I use for display. And below are some close-ups of a couple of my Trash Vessels.This one is called: Broken Shells From The Egg Of Desire. Can you see the diamonds from an egg carton? The beads are sterling silver.A close-up from "Bells of Clarity". The bells are caps from water bottles, the clappers are clothing clips. Those bugle beads are 14K goldfill.
This one is "Make A Wish" and has silver stars cut from milk cartons.I have been painting brown paper bags lately. I am finding that it makes a great collage-able paper. It is thick and makes even more dimensional the finished collages - which I like. Above is one in blues and greens. Below is the start of another. I first paint the brown paper - a bag cut open - with gesso which gives the paper a lovely malleable, rubbery hand.I am painting, you will see, on a piece of BlueBoard. It is an insulation board that I got at the hardware store. I think it came in a 4' x 8' piece and I cut it with a utility knife into six pieces. I paint on them - and don't mind the spatters - then pick up the whole board and place it somewhere out of the way to dry. Ever tried picking up wet paper? So awkward. This solves all that. I love these boards. If I ever decide that they are too paint ridden, I will carve into them, paint them and turn them into art. :)I have been taking painting lessons from a local painter. A whooole new way to use my brain and the acrylic. I am learning that one paints a little, lets it dry, adds new colors and depth, layering on until lovliness is achieved. I have a ways to go here...Here is a yummy view of one of my bead walls. Jam and peanut butter jars mostly on specifically measured shelves.

I have art hung everywhere...And my computer: an important art tool. Recognise the wallpaper there? It is from my birthday party in June.

Thank you so much for stopping by. I have a little door prize for the first 25 visitors: an ATC, an ATC sized piece of that blue and green painted paper that I just showed to you, and a bit of ephemera from my studio. Just leave your mailing address at my email: robinsunne@robinsunne.com. (Don't leave it here: not so private for you.) International address are O.K. I will amend this post when I have your 25 addresses.

Hi--- Thanks for all of the visitors and comments. The doorprizes are all done. I will send them out today, Monday, you should have them by the end of the week.

"See" you around...

Tuesday, September 29, 2009

Accordion Book Hinge Part II


Well ... here are the results:
I would say that those are too many glue warpings. Huh. Does anyone know: is there a better kind of glue to use? Would the warps flatten out if I left them under the books overnight (instead of for only 1/2 an hour?)

Now that pale green/contrasting fabric is really noticeable. I would want to use fabric that was the width of both pages and whose pattern or color really added to the statement of the book. For now I like better the matching blue:And here is the book all folded up:I think that I will fill the book and post about that later.

Was this helpful?

Accordion Book Hinges

Good Morning/Day/Night (wherever, whenever you are).

I am a member of the TrueNorthArts Yahoo Group and there was a question of how to make a really loooong accordion book without really loooong paper: how does one connect shorter papers without bulking up the book?

Here's the idea I had: use fabric as the hinge. Now, as I am not really sure what I am talking about, I thought I'd do it myself, photograph the steps and see what happens. Let's go.

Step One:
Cut your papers into the correct height for your book's pages. I am using Canson art paper here. A little shout out to the Canson People. Nice papers, thank you.
Step Two:
Fold the papers into the correct width for your book's pages. You might be noticing that not all of the papers are folded to the same width. I just wanted to see what would happen. Stay tuned.

Step Three:
Cut one piece of fabric for each hinge between two ends of the various accordion folds for your book. NOTE: Cut them a bit taller than the paper - we'll trim them exactly later. I used solid cotton broadcloth. Now I have cut one pale green fabric that doesn't match the paper for contrast? An artistic statement? And then I used one blue cloth that almost exactly matches the fabric to see how invisible I can make this hinge.

Step Four:

I neatened the long, vertical edges, cutting off the little fringies and unwoven threads. I did not cut the top or bottom as we will do that later.

Step Five:
I placed one fabric piece on a piece of clean paper (I cut up all of my recycled papers to make notebooks for myself and didn't have any big enough for this project.) I got out my Elmer's white glue (Hello Elmer's Products, Inc.) and squirted some (too much! - read below) on to get ready for ...
Step Six:

...where I painted the glue all over the fabric. Make sure that you get the glue evenly spread aaaall over the fabric. Pick up the gluey fabric and put it on a clean piece of paper (so that you don't get the extra brushed glue where you don't want it.)

Step Seven:

Place one end of one folded paper down, rubbing it into place.
Step Eight:

Then press the other down. Now, see how the papers are wrinkling a bit? Too much glue. I tried using less glue on the next hinge...

Step Nine:

So I tried less glue ... but it wasn't enough ... so I about doubled the amount shown here, ending up at slightly less than the pale fabric above.

Step Ten:

I put the next set of folded papers on, abutting them about as precisely as I could. But I was in a hurry and cut badly - see how they don't match at the top?With the pale fabric I cut off the extra fabric at the top and bottom with a pair of scissors, but here I used a metal straight edge and an X-Acto knife.I liked how very much easier and neater that was. Can you see in this photo that I just cut off the extra tall paper. (No one ever accused me of being a Type A personality.)

Step Eleven:

I covered each page, both sides, with some plastic wrappers that I had in my studio then laid books on top of the paper/cloth hinges. I will send off this post, go undo the stack - hoping that the wet-glue-warps might have flattened out, and post you the results. (A short advertisement here - I used my own books for the stack! Nannee, The Great Library ATC Swap and Chang E, The Lady of the Moon.)